What is JUnit Testing?
JUnit is a framework which can be used to write tests for your code. Tests are important, because they allow you to ensure each piece works individually as expected, in a controlled environment. Throughout the semester, JUnit will become a valuable resource if you learn to use it, as it can help you debug assignments.
In this assignment, you will be using JUnit to test the given SmartCat.java class, which is an extension of the Cat.java class (see the Inheritance section below).
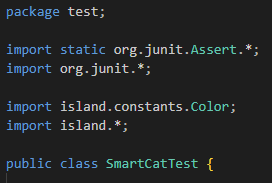
We include the JUnit library in your project files, under the lib folder. Do not remove these jar files.

To write tests, we create a “test” directory in the same project folder (src and test will be in the same directory). Then we will create a test java file. For this lab since we are testing SmartCat, it will be named “SmartCatTest.java”.

We then declare the package, import the JUnit framework, import anything we need for our tests, and then declare the class as normal. Note: You are given all of this in the project files.
How to write JUnit Tests
To create a JUnit test, you simply define a method starting with the word “test”, and usually followed by a method or feature name you want to test. You should annotate it as a test method, by placing “@Test” right above the method declaration.
For example, the SmartCat class has a walkPath() method you will test, so the test is defined as:
![]()
JUnit tests rely on assert statements, which are methods you can call to check if certain things are equal. The most important assert statements are:
assertEquals(expected, actual): Checks if the expected value matches the actual value.assertTrue(condition): Verifies that the given boolean condition is true.assertFalse(condition): Verifies that the given boolean condition is false.assertNull(value): Verifies that the value is null.assertNotNull(value): Verifies that the value is not null.
You can use these to check that specified conditions are true. This is useful in order to check the return values of methods, or check object attributes after running methods. The flexibility of these methods is why JUnit is such a powerful tool.
EXAMPLE:
We can write a simple test method for the Cat getter methods. Reminder: A getter method is simply a method which returns an attribute from a class. i.e. cat.getName().
We will first define our test method in the SmartCatTest.java, as the “testCatGetters()” method, annotated with the @Test tag.
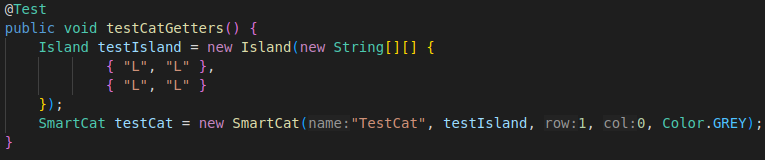
The first thing you should do is set up any objects needed for this test. In this case, we will be testing a cat, which needs an island to exist. So we first create a testIsland, which is a 2×2 island of only land tiles (see Task 1 for more info on creating Islands as shown above). Then, we also create a testCat and place it on the island.
This testCat is given the following attributes:
- String name = “TestCat”
- Island homeIsland = testIsland
- int row = 1
- int col = 0
- Color catColor = Color.GREY
We want to test the getter methods for each of these, and make sure they return these exact values.
We will use mainly assertEquals(expected, actual) and assertTrue(condition) to do this. We can first check to see if testCat.getName() is equal to the name we originally passed in.
![]()
Then, we will check to see if the cat’s coordinates are as expected.
![]()
Finally, we will check to see if its home island, and its color are the same too.
![]()
This is the complete test method:

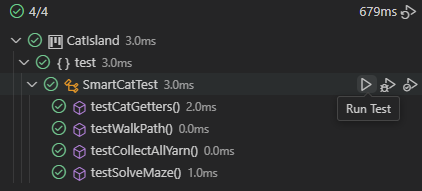
To run this test, we will use the Java test runner, located on the VSCode sidebar (after you install the correct extensions listed on the Course FAQ).
![]()
From this tab, you can choose your available test classes, and run either the whole class (all the tests) or any individual test.
A test fails when one of the assertion statements is not successfully passed. For example, if we create a cat with the wrong name, the assertion statement checking the name will fail. When the assertion statement fails: it will throw an AssertionError or ComparisonFailure, stop the current test, and move onto the next test.

We can see above that the cat was created with the name “FailCat”, but the assertEquals statement was told the name should be “TestCat”, causing the comparison error. So the testCatGetters() test will fail, while the rest will still pass.

With this in mind, you can write simple tests for SmartCat as shown above, by testing cat coordinate values, as well as other attributes listed in Tasks 4-6 below. (Note that testCatGetters() is just an example and is not part of the tasks you need to complete.
Inheritance
As reviewed in the last lab, OOP is a type of programming which wraps information into “Objects”, each containing data and code. Data is stored as the object’s attributes and code is stored as the object’s methods.
In that lab, each object was clearly and uniquely defined in its own class file, containing all the necessary code for an object of that type to exist. But a key concept in OOP is inheritance, which states that classes can build on each other.
For example, if we need to represent a Person, Employee, Customer, and Manager, we can do so with inheritance. Rather than redefining basic information like First Name, Last Name, and Date of Birth in all the above classes, we can choose to only define it in the Person class. Then we can make Employee and Customer extend the Person class.
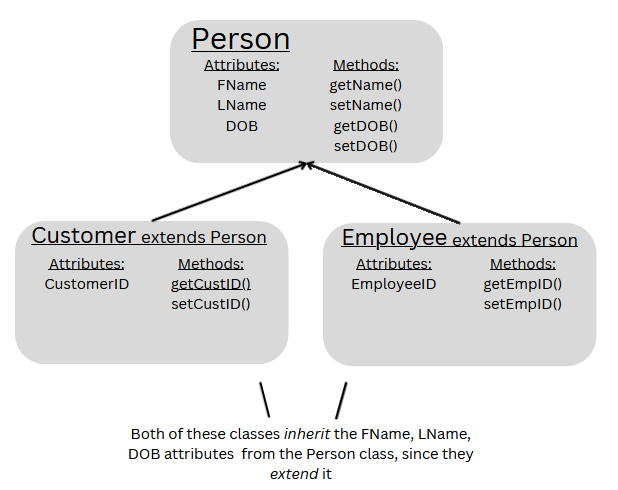
The Customer and Employee classes are considered child classes, and Person is considered the Parent class. The child classes inherit the parent classes attributes and methods. In the child classes code, you can only directly access the public attributes/methods.
SmartCat extends Cat
In this lab, you will write JUnit tests for a SmartCat class. This SmartCat extends the Cat class from Lab 1, meaning it still contains the same base Cat we are familiar with underneath. But it adds new methods which give the base cat more capabilities.
The SmartCat constructor is written exactly like the Cat constructor, taking the exact same parameters. This constructor then uses the super keyword, which can be used to call the Parent class’s constructor (aka the Cat constructor).

Remember from Lab 1, the Cat constructor (called by the super keyword in this case) initializes the cat’s attributes with the given values. Since the SmartCat inherits the Cat class values, those are the ones that get initialized.
SmartCat only contains 3 public methods which you can call. The first is walkPath() which walks a 1×1 path. The second is collectAllYarn() which makes the cat collect all reachable yarn on its island. The third is solveMaze(), which will navigate from the top left tile to the top right tile, through any solvable maze.
These methods all call the existing cat move methods and use the island object to traverse intelligently. You don’t need to worry about the implementation of these methods, just how they are used. You will need to call these methods in order to test them in SmartCatTest.java
Overview
The first part of this lab is designing test cases (different islands) for the three methods. You will do this by instantiating three Island fields (pathIsland, yarnIsland, mazeIsland) in the SmartCatTest class, by using the Island constructor method (more details below). These islands will follow certain requirements and parameters.
You will then write three corresponding JUnit tests which create a SmartCat on each island, and run the corresponding method. You will use JUnit assertions to check specific conditions being true or not.
You will be graded on the islands being correct, the test cases functioning properly, and the code coverage of the tests. Code coverage (see task 7 below) is how much of the target code (SmartCat) gets executed by the tests. Since the SmartCat is still simple, it can be covered mostly with simple test cases.
Provided Classes
The provided classes for this Lab are the same as Lab 1, with the addition of the SmartCat class.
The Driver class is slightly modified. The control panel now has 3 buttons, one for each of your test case islands (pathIsland, yarnIsland, mazeIsland). You can select any, and it will load up the island you’ve created, where you can then run the corresponding SmartCat method and watch it either walk your path, collect your yarn, or solve your maze accordingly.
Note: by default, the islands will appear blank in the Driver, since they are not instantiated yet.
Directions
- DO NOT add new import statements.
- DO NOT add any new class attributes
- DO NOT change any of the method’s signatures.
- DO NOT modify the given constructor.
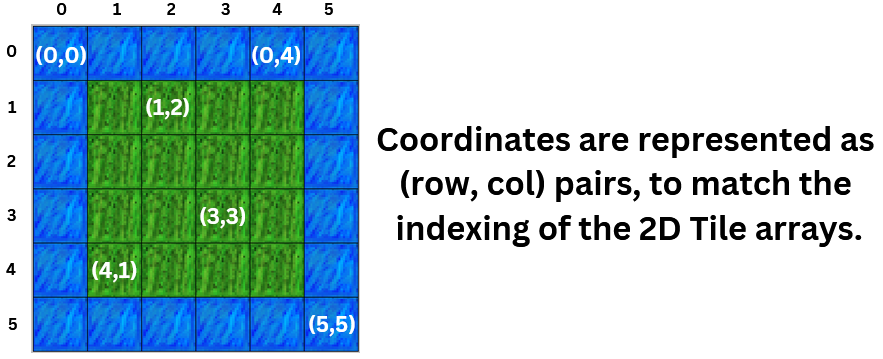
Note about Coordinates:
To complete this Lab, you will fill in SmartCatTest.java, with custom Island test cases, as well as JUnit test methods.
To Run: Open the project directory in VSCode, and click the Run Button (either in the Driver class for a visualization or SmartCatTest class to run your tests). Make sure you are in the correct directory, you should open the SmartCatIsland folder which directly contains the test, src, lib, and res folders.

To Run JUnit Tests: Make sure you install the Test Runner for Java extension and all other required extensions, listed on the Course FAQ page. Right click SmartCatTest.java and select Run Tests.
Task 1: Create pathIsland
The first task is creating a pathIsland for the testWalkPath() test case. This path should be a single wide path. This island (and the next two) can be as bare bones or as creative as you want, as long as they meet the requirements.
The requirements for pathIsland are:
- Be at least 7×7
- Be a single wide path. No land tile can have more than two adjacent land tiles.
- The path must be at least 25 land tiles long
- The path must start at (0,0) top left, and end at the top right corner (0, cols-1)
Creating Islands:
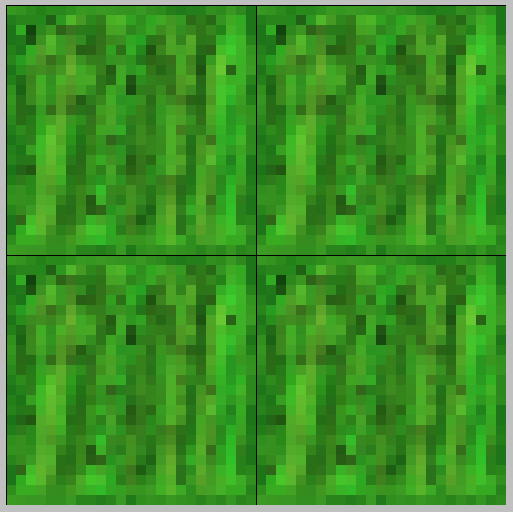
To create the island, you should use the Island constructor, which takes in a String array as its only parameter. You can use the string tokens “W”, “L”, and “Y” to create your island. “W” represents water tiles, “L” represents land tiles, and “Y” represents a land tile with a yarn placed on it. As a smaller example, to arrange these in a 2D string array, you can do:

This creates a 2×2 island of only Land tiles, but remember that this example differs from what you need to implement — your island should match the requirements above (at least 7×7, etc). You can use the Driver to visualize for pathIsland, yarnIsland, and mazeIsland. The above island looks like this:
You can add more strings to each row to increase the width, or add more rows to increase the height. Just make sure the number of columns stays constant through the whole array (i.e. all rows have the same number of tiles in them).

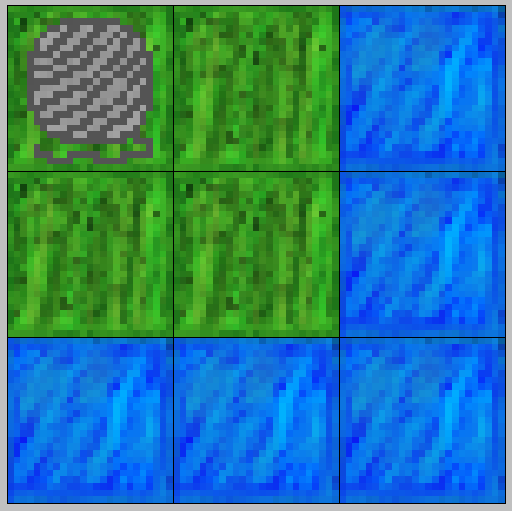
The above is a slightly modified island, which adds a new row/col of water tiles along the bottom/left side, as well as adds a yarn tile to the top left with “Y”. A yarn tile is simply a land time, with the hasYarn attribute set to true.
Note: The islands shown above are square (width == height). You don’t have to make square islands, but rectangular islands will visualize stretched in the driver. You can pad rectangular islands with water tiles to make them square.
Hint: Draw out your island first to meet the criteria, then write out what arrangement of “W”, “L”, and “Y” you need, and then finally work on the 2D array. You can use the Driver to visualize your island and correct any mistakes.
Task 2: Create yarnIsland
The second task is creating a yarnIsland for the testCollectAllYarn() test case. The process for creating this island is the same as Task 1, but the requirements are different.
The requirements for yarnIsland are:
- Must be at least 9×9
- Must have at least 40 land tiles
- Must have at least 20 water tiles
- Must contain at least 9 yarn
- All yarn must be reachable by a SmartCat spawned at (0,0) top left corner.
You can create the yarnIsland the same way as pathIsland above, with the new constraints instead.
Task 3: Create mazeIsland
The third task is creating a mazeIsland for the testSolveMaze() test case. The process for creating this island is the same as Task 1 and 2, but again the requirements are different.
The requirements for mazeIsland are:
- Must be at least 10×10
- Must be at least 55 land tiles
- Must be at least 30 water tiles
- Must contain NO yarn
- Must be a maze, which is solvable by a cat spawned at (0,0) top left, ending at the top right corner (0, row.length-1)
- The correct solution must be 30 land tiles long; there can’t be a solution shorter than that.
Just as with the previous islands, this island can be as bare bones as detailed above, with a very simple maze to achieve code test coverage. You can create the mazeIsland the same way as pathIsland/yarnIsland above, with the new constraints instead.
