Assignment ArtCollage – 100 course points
This assignment you will create a collage of images.
Refer to our Programming Assignments FAQ for instructions on how to install VSCode, how to use the command line and how to submit your assignments.
Overview
The goal of this assignment is to perform several operations on digital images.
Your cellphone are computers with lenses and light-sensitive devices capable of capturing images in digital form, and your computer has photo-editing software that allows you to process those images. You can crop them, enlarge and reduce them, adjust the contrast, brighten or darken them, remove redeye, and a myriad of other operations. Many such operations are easy to implement, given a simple data type that captures the idea of a digital image.
Digital Image
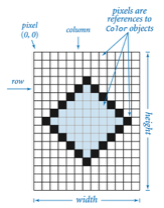
A digital image is a rectangular grid of pixels (picture elements), where the color of each pixel is individually defined.
An image can be represented as a 2D array where each array cell has a color.
Color is a sensation in the eye from electromagnetic radiation. Since we want to view and manipulate color images on our computers, color is a widely used abstraction in computer graphics, and Java provides a Color data Type.
Color
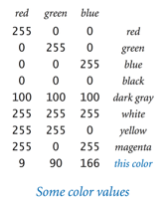
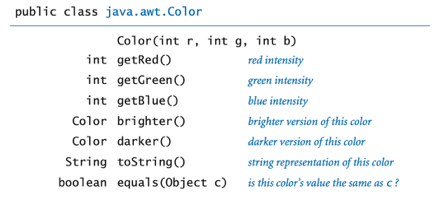
To present color values, Color uses the RGB color model that represent the intensity of the red, green, and blue components of the color. Other color values are obtained by mixing red, green, and blue components. That is, the data-type values of Color are three integer values.
// The Color data type has a constructor that
// takes three integer arguments.
Color bookBlue = new Color(9, 90, 166);
System.out.printf("Green component %d", bookBlue.getGreen());
The API for Color contains several constructors and methods; three of the methods enables the programmer to retrieve the Color components intensity separately (see far right).
Picture
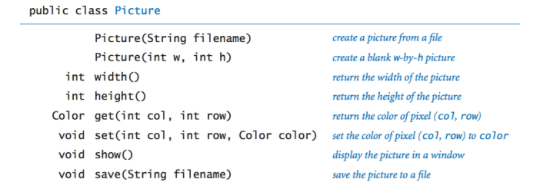
The Picture class from the Introduction to Computer Science book is a data type for digital images whose definition follows from the digital image abstraction (see Digital Image above). The set of values is a two-dimension array of Color values, and the operations is what you would expect (see right).
By convention, (0,0) is the upper-leftmost pixel, so the image is laid as in the customary order for two-dimensional arrays. The supported file formats for the first constructor are PNG and JPEG formats.
Implementation
Overview of Files:
- Picture, which is described above (from CS111). Do not edit this class.
- Collage, which contains some provided methods in addition to annotated method signatures for all the methods you are expected to fill in. You will write your solutions in this file, and it is the file which will be submitted for grading.
- Driver, which you can run to test any of your methods interactively. Feel free to edit this class, as it is provided only to help you test. It is not submitted and it is not used to grade your code.
- StdIn, which is used by the driver. Do not edit this class.
- Multiple jpeg files that can be read by the driver as test cases. They are not submitted.
Methods to be implemented by you in Collage.java:
Collage keeps at all times two digital images as Pictures:- original picture, which is the image from the input file without modification. Do not modify this image.
- collage picture, which is the image you will perform operations on.
- You are going to manipulate this image as if it is made up of tiles. The image has collageDimension x collageDimension tiles.
- Each tile is made of tileDimension x tileDimension pixels.
- one-argument constructor
- set default values of collage dimension to 4 and tile dimension to 150.
- initializes original picture with the filename image.
- initializes collage picture as a Picture of tileDimension*collageDimension x tileDimension*collageDimension where each pixel is black.
- update collagePicture to be a scaled version of original.
- three-arguments constructor
-
- set default values of collage dimension and tile dimension to argument values.
- initializes original picture with the filename image.
- initializes collage picture as a Picture of tileDimension*collageDimension x tileDimension*collageDimension, where each pixel is black.
- update collage picture to be a scaled version of original picture.
- scale
- used in both constructors.
- changes the size of a picture to fit into another.
- how to scale? see the code here.
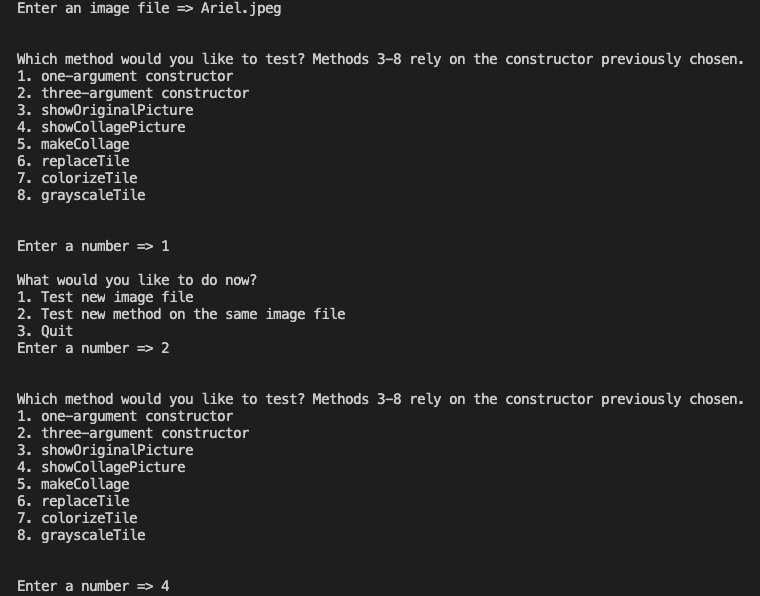
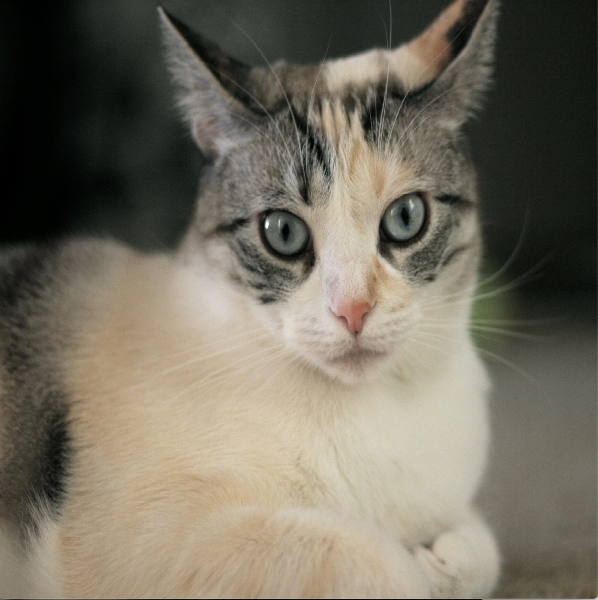
The original image (Ariel.jpeg) has 1536 rows x 1819 columns. The collage image that results from the one-argument constructor (on the left) has 600 rows by 600 columns.
The scaling method made the original image smaller to fit into the collage picture size.
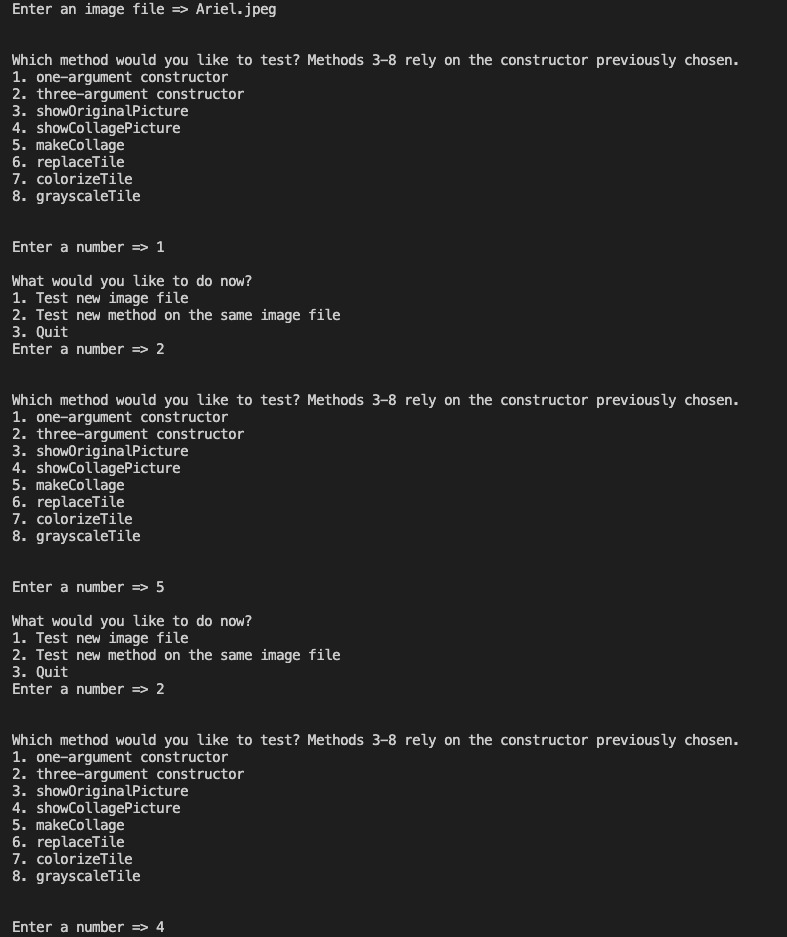
- makeCollage
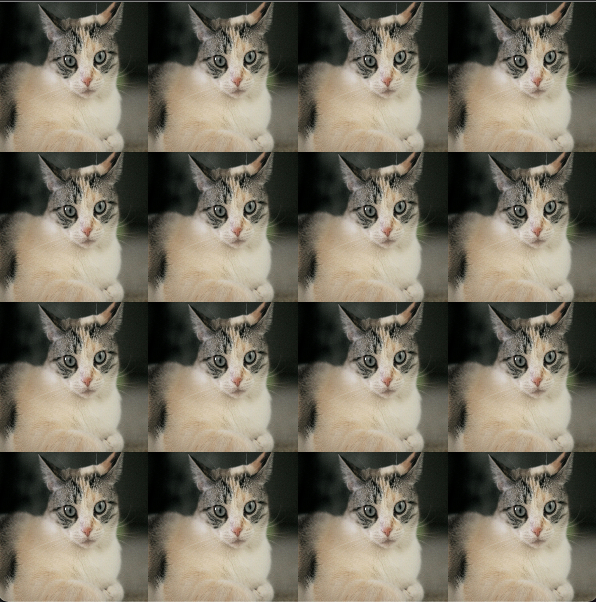
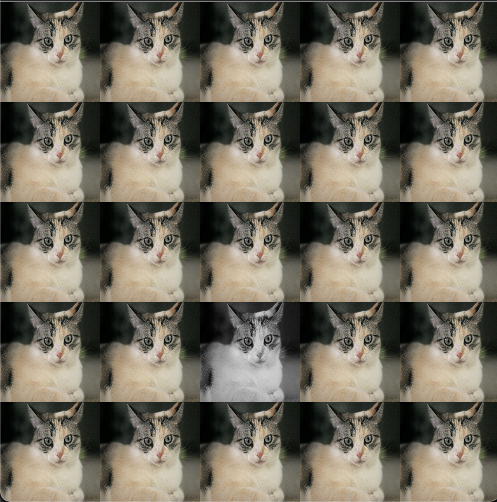
- make a tile of tileDimension x tileDimension pixels by scaling down the original picture.
- update the collage picture to be a collage of these tiles. Meaning, each tile is repeated in the image.
-
the collage picture will have collageDimension x collageDimension tiles.
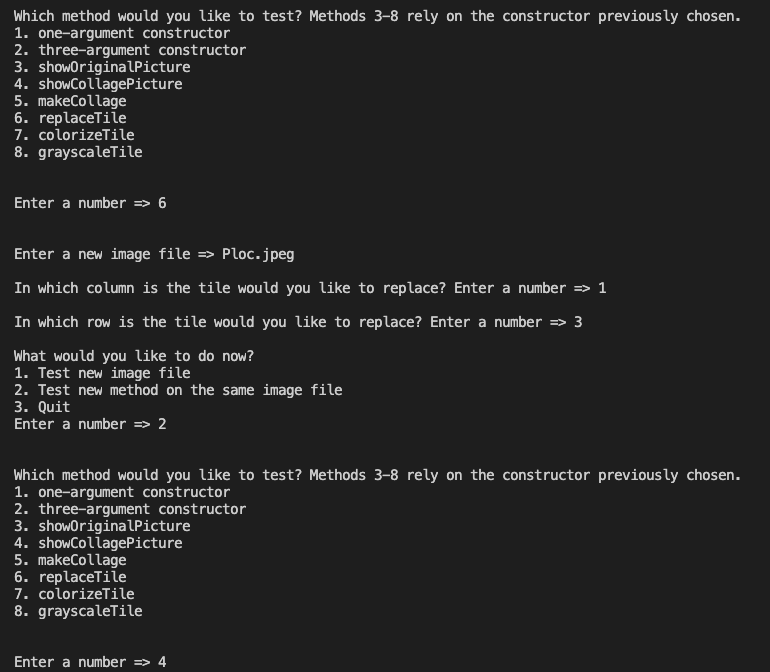
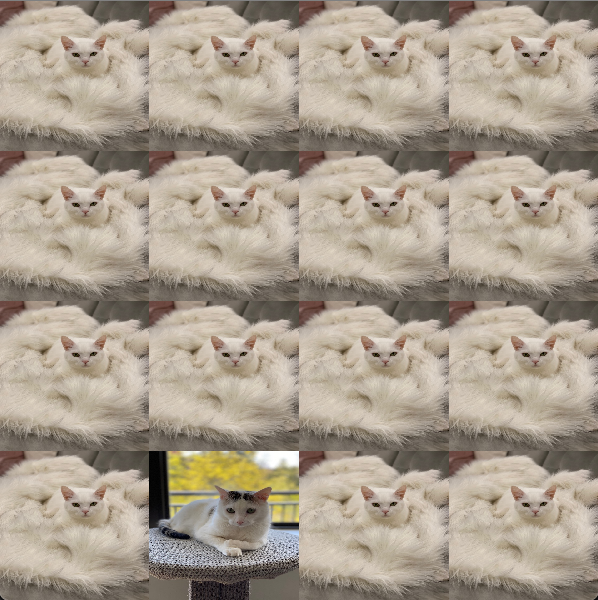
- replaceTile
- replaces a tile on the collage picture with another image.
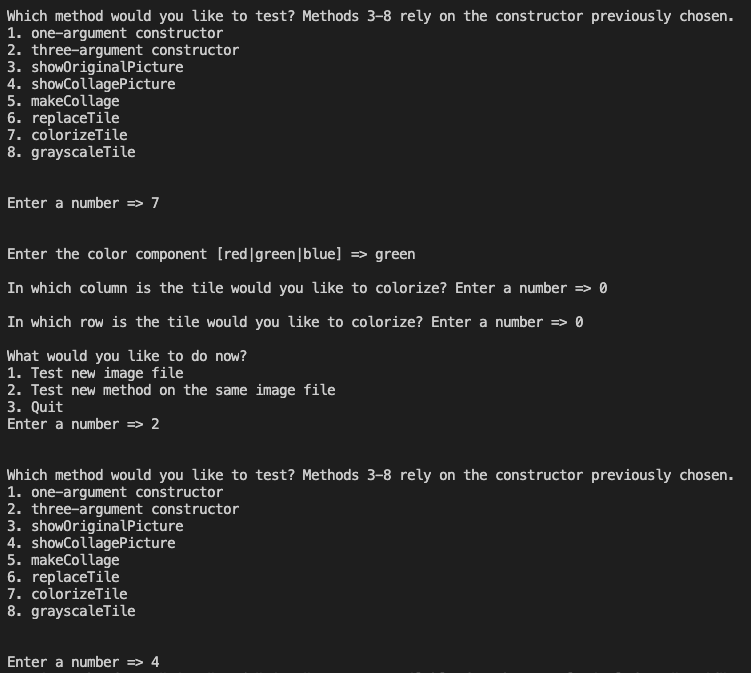
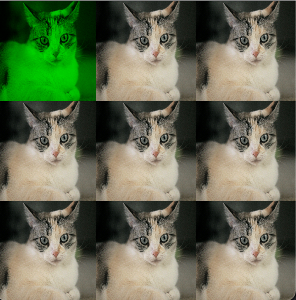
- colorizeTile
- colorizes a tile in the collage picture using red, green, or blue component.
- to colorize a tile “green” do for every pixel:
- get the pixel’s color’s green intensity.
- update/set the pixel with only it’s green component.
Color color = picture.get(col, row);
int g = color.getGreen();
color.set(col, row, new Color(0, g, 0));
- grayscaleTile
- grayscale a tile of the collage picture.
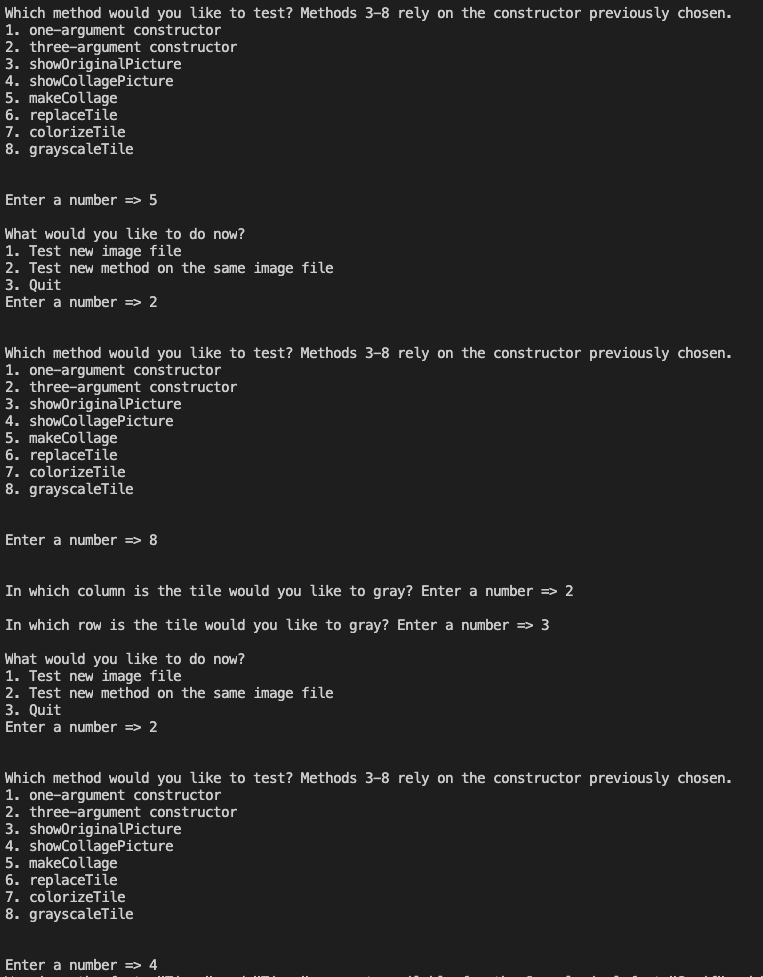
- update the pixel’s color of a tile to have the grayscale value computed by applying the toGray() method provide.
Implementation Notes
Update and submit the Collage.java file on Autolab.
Observe the following rules:
- DO NOT use System.exit().
- DO NOT add/rename the project or package statements.
- DO NOT change the class name.
- DO NOT add import statements other than the Color class already in the Collage.java file.
- DO NOT change the headers of ANY of the given methods.
- DO NOT add any new class fields.
- You may USE any of the libraries provided in the zip file.
VSCode Extensions
You can install VSCode extension packs for Java. Take a look at this tutorial. We suggest:
Importing VSCode Project [how to video]
- Download the zip file from Autolab Attachments.
- Unzip the file by double clicking it.
- Open VSCode
- Import the folder to a workspace through File > Open Folder
Executing and Debugging
- You can run your program through VSCode or you can use the Terminal to compile and execute. We suggest running through VSCode because it will give you the option to debug.
- How to debug your code
- If you choose the Terminal, from ArtCollage directory/folder:
- to compile: javac -d bin src/art/*.java
- to execute: java -cp bin art.Driver
Before submission
- Collaboration policy. Read our collaboration policy here.
- Submitting the assignment. Submit Collage.java via the web submission system called Autolab. To do this, click the Assignments link from the course website; click the Submit link for that assignment.
Getting help
If anything is unclear, don’t hesitate to drop by office hours or post a question on Piazza. Find instructors office hours by clicking the Staff link from the course website.
Uses libraries and content from Introduction to Computer Science book.
by Ana Paula Centeno and Fran Trees
